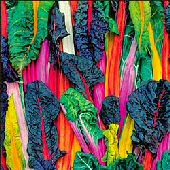
Seed from HometownSeeds.com included: Black Beauty summer squash, Swiss chard, Yolo Wonder sweet pepper, Champion radish, Bantam corn, Scarlet Nantes carrot, Long Green cucumbers, Golden Acre cabbage, Kentucky Wonder Pole beans, Rutgers tomatoes, Waltham Butternut winter squash, Detroit Dark Red Beets, Lincoln Peas, Parris Island Romaine Lettuce, Bloomsdale Spinach http://www.hometownseeds.com/survival-seeds-c-213/survival-seeds-peace-of-mind-for-your-family-p-35.
Get Busy!
Zone 7
With lower elevations and longer days, a variety of vegetables will thrive in a Zone 7 garden. Lettuce, cabbage, broccoli and Brussels sprouts can be planted before the last frost. Carrots, beets, radishes, and parsnips will also do well. Onions, potatoes, peas, radishes, salad greens, and a variety of herbs can also be planted during this time frame. Most areas in zone 7 get moderate to high rainfall and many areas have little snowcover in winter. This makes zone 7 gardening an ideal gardening environment. Fall-grown vegetables, in particular, are usually of very high quality.
Read more at Suite101: Zone 7 Gardening: Growing Vegetables in the "Middle Ground" Suite101.com http://vegetablegardens.suite101.com/article.cfm/zone_7_gardening#ixzz0aQUvPuRG
Living & Eating Local ~ It can be done! ~ All Season's ~ Local Cheese,Beer and Wine making supplies Back to the Land Store ~ Erin,TN Bugtusslefarm ~ CSA Davidson County Master Gardeners Delvin Farms ~ CSA East Nashville Organic/Local Farmer's Mkt Eaton Creek Farm ~ CSA Fellow Ship of the Commons org. Franklin Farmer's Market Hill and Hollow Farm ~ CSA Hohenwald being coming a Green Town Local Table !! Nashville Farmer's Mkt Nolensville Feed Mill Paradigm Farms ~ CSA ~ meat Pipsissherbs ( Local TN ) one of THE best Herbal Folks The Flatrock Cafe!! The Green Pergola ~ for all your soap and oil needs The Turnip Truck ~ Local Organic Food Store
Yes You Can
Thank you to these Followers
You all know I'm a fan of seeds. My friend Elle Bobier says a few seeds sprouting in a clay pot is a miracle.
Overnight Okra
Mother and Son
The Nutcracker at Tennessee Performing Arts Center
When I talk about pictures in my mind I am talking, quite specifically, about images that shimmer round the edges…you just lie low and let them develop.Joan Didion
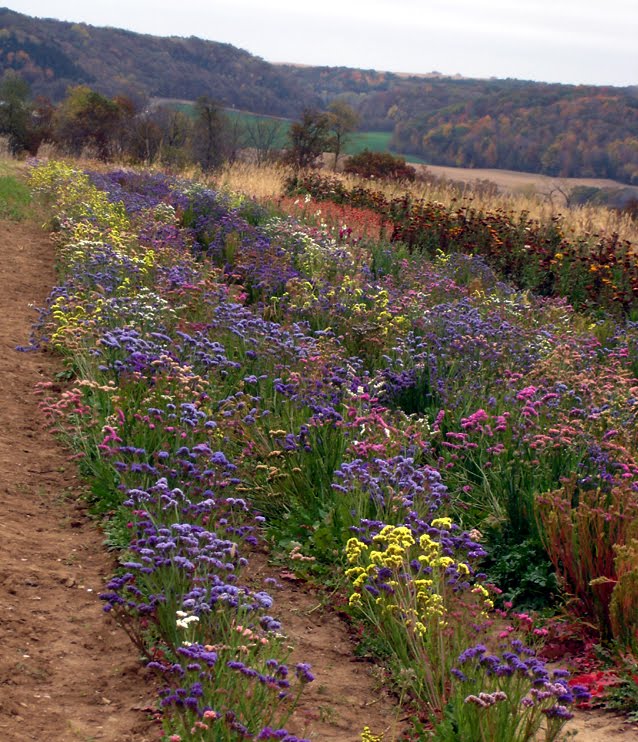
Rough cut fields spotted with brown hay bales… smooth rounded gourds in gold, orange and green… sharp smell of mown grass… fat yellow garden spiders weaving stories in their webs…brown crunchy leaves underfoot… Farmer’s market bounty: colorful greens, papery onions, gourds and pumpkins…blue cloudless skies…clever scarecrows in straw hats and overalls…a clump of brittle corn stalks…
Fall is my favorite time of year. The skies are gorgeous, gardens putting forth their last glorious efforts, and the sensory sensations of the season are Nature’s last gifts before the onslaught of winter.
Fall planting is a wonderful thing, giving us a chance to enjoy Nature’s bounty up until the holidays. Now until Aug 15th is the time to start sowing the seeds for another crop. And while Fall planting is not easy, with care and attention you can have another bumper crop this year.
Most importantly, choose the right plants for the season. Remember, these plants will be fighting extreme heat, low water, full-grown insects, and those ever-present weeds. Near the end of their season the weather will be cold, perhaps rainy, so you want plants that are meant to grow in those conditions. Broccoli, cabbage, snap beans, collards and other greens and lettuces, radishes and potatoes all perform well when planted late in the season.
Follow the directions on the seed packet or plant insert that direct you when to plant. If you live in Nashville, keep in mind that the first frost date is approximately October 29th and count backward accordingly. If the plant requires 60 days to fruition, you want to plant by August 29th or sooner to beat the frost date.
Plants require nitrogen, and fall plants are no exception. Fertilize your seed with nitrogen. Nitrogen is very mobile in the soil, making it subject to leaching and other types of losses, so it has to be replaced. Urban soils are often lacking in nutrients, especially where organic material such as leaves and grass clippings have been constantly removed and not allowed to return nutrients to the soil. Adding compost, leaf mould, animal manures, seaweed, straw, etc. on a regular basis is the best recipe for plant health. A word of warning though: don't incorporate organic matter deeper than 20cm - it can produce gases around the roots of plants and kill them. Organic mulches are great for water conservation and weed control as well. Organic material does however use up nitrogen as it breaks down. A good way of replacing nitrogen is planting a green manure crop of legumes and digging the crop into the soil. Chemical fertilizers allow you to be more scientific and exact in the way you apply nutrients.
All in all, you can plant fall crops with confidence by following the tips mentioned in this article. I relied heavily on the websites listed below and even used some of their words verbatim. Please visit both sites for more extensive info.
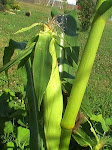
The key to high quality sweet corn is rapid growth, adequate soil moisture and nutrients, and harvesting the ears at optimum maturity.
When the corn is about 6 inches tall, thin short varieties to two feet apart and tall varieties to three feet apart. Although corn can be grown closer together than this, the roots are then more crowded and more watering and feeding are needed. Corn is a heavy user of nitrogen. Fertilize in the spring, again when the corn is eight inches tall and again when the plants are 18 inches tall. Hill soil around the plant roots to help support the stalks.
Watering is very important. Keep the soil evenly moist. Corn often grows so fast in hot weather that the leaves wilt because the roots can't keep the leaves supplied with moisture. Although corn requires much water, avoid getting water on the tassels. The pollen from the tassels must fall onto the corn silk to produce kernels, and if pollination does not occur, all that will grow is the cob. Weed early and keep the weeds cut back. Remember that corn has shallow roots, and a vigorous attack on the weeds may destroy the crop.
I’ve been promising to include some recipes from my food storage. Here are a couple of quickies.
Chicken Alfredo with peas
1 jar of Alfredo sauce¼ c. dried peas 1 can white chicken breast meat Spelt
Dried mushrooms Start the water for the spelt. Combine the sauce, peas and chicken in a saucepan. Simmer on low until peas are tender. Boil spelt until tender. Drain and serve with sauce on top.
Cannellini with Dried Shitake and Canned Diced Tomatoes
Cannellini beans, cooked
Shallot or onion
Garlic, thyme, oregano
Dried mushrooms
Cook dried beans according to instructions. In a skillet, melt some high-heat canola oil. Thinly slice some shallot or onion and sauté. At the last minute, add some minced garlic. Stir until garlic starts to turn golden. Add tomatoes with juices. Simmer. Add thyme, Greek oregano, salt and pepper, mushrooms, and beans. Simmer until mushrooms are soft. Serve over noodles.
Got wisteria that won’t bloom? It might be that your plant is going through its juvenile phase, which encompasses the first seven years of the plant’s life. Prune wisteria in late spring or early summer for more blooms. You can control the shape of your wisteria with pruning.
Pinch back your mum three times before July 4th. Don’t bother them after that for full fall blooms. Failing to pinch back mums results in early blooming and leggy plants.
Take control of weeds. Spending five minutes a day on weeding will help you avoid spending hours later.
Chicken wire and rebar help keep the cats from scratching in your gardening areas.
Remember to use the magic formula when you plant:
1/3 cup sugar
1/3 cup bone meal
1/3 cup Epsom salts
1/4 cup blood meal
Mix together and add about a tablespoon to the bottom of the plant hole. Fill with water and let the water drain out. Then plant. This works best for flowering plants.
Sometimes azaleas will grow in a sunny spot, but the bloom period will be shortened.
Forsythia sets bud right after the blooms fade, so if you’re going to prune, do it as soon as blooming is finished. This will increase the number of blooms on the rest of the plant and cause the plant to thicken.
Got clay soil? Don’t despair. You can grow roses. Follow online instructions for planting, pruning and feeding. Knockout roses are fun and easy to grow.
"It began in mystery and it will end in mystery, but what a rare and beautiful country lies in between." --Diane Ackerman
I can’t help but apply this quote to my gardens. They too begin in mystery, with a tiny seed that magically grows. At the end of the season, they simply die, a mystery in itself. But oh, the beauty in between.
I’m dying to try whatever new and experimental gardening method comes out. I have raised French intensive garden beds, a cinder-block composter, a drip water system, companion plantings, cold frames...you name it. Recently I got on a straw-bale garden kick. The pictures look great, the gardens produce, and it wouldn’t take much of an investment. But suddenly I found myself visualizing the work involved in getting the bales ready, the intensive watering required, and I realized I’m not ready to add to my existing collection of garden beds—I’m not even taking care of the ones I have!
So today I re-sketched the front and back yards and all the different gardening areas. It’s easy to see from the drawings where the weak points are. I do these sketches in pencil so I can erase and rename areas that change and are added to.
Following the paperwork phase of taking care of the yardens, I
spent two hours weeding and grubbing onions,
spread a cup of blood meal each on the compost heaps and watered in,
fed the seedlings, indoors and out,
and mowed around the raised bed gardens.
Small chores, true, but necessary to the health of the garden, the compost heap, and the neighbors’ happiness. My gardens will reflect the level of attention and care they’ve received from me. I learned that it’s more fun to start a new project than continue with an old one, but that continuation is what brings about good results.
This year you want to make a garden. You’ve tried before with little success, and you’ve decided to make it happen this year. But there’s all this ground in your yard and you don’t know how to start. Where do you begin? My best advice to new gardener’s is to use raised-bed gardening. It helps cut down on weeding and provides an instantly wonderful growing medium for your plants.
Now is the time to build your garden. Here is my list of steps to help you get started this year. No tools needed.
Materials Needed:
16 cinder blocks
Newspapers
One bag manure
One bag sand
One bag peat
Six bags of top soil
Find a spot that gets sunlight for at least eight hours a day. No shade trees nearby, no other plants growing around the area that might pollute your food garden.
Lay the cinder blocks out in a square or rectangle.
Line the bottom of the square with thick, thick layers of newspaper. Be sure to line under the cinder blocks to keep weeds from growing out of the holes in the blocks.
If you have raw compost, spread a layer over the newspaper.
Pour three bags of dirt over that layer.
Add a layer of leaves if you have them.
Pour the sand, peat moss and manure next.
Top with the remaining top soil. Add top soil into the holes in the cinder blocks.
Congratulations, you’ve built a raised-bed garden. Think of it as a large flower pot where you will be growing your veggies.
PLANTING
You have 4 square feet of earth to grow foods in. Using the French Intensive gardening method, you place your plants in such a way that they shelter and mulch each other. Here are things you can plant in your garden bed.
Remember when you plant, slightly water the soil first, and then put the seed in the prepped soil. You only want to plant as deep as the seed is large. For myself, when I plant a new bed outdoors, I cover it with landscape cloth to keep the cats from digging in the soil. That also allows me to plant early.
These plants need their own beds or prepped areas away from your raised-bed garden:
Zucchini, Eggplant and other squashes
Tomatoes
Peas
Cukes
Pumpkins
Some herbs
Look around your yard for other planting spots. Do you have a fence or trellis that gets lots of straight sun every day? Perfect place to plant peas. Peas are very forgiving, they are easy to grow and harvest. Mine grow up the trellis on the deck and on the fence in the courtyard.
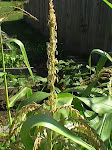
Tomatoes need a huge growing area. You can see from the photo of my September tomatoes that by fall you’ll have your hands full. I grow mine on hills along the fence next to each other.
HERBS You can plant herbs with your other foods. Stay tuned for more information about planting herbs.
February is a tough month. The weather can be relentless, and those sunny days are few and far between. I sit at the window like a cat, gazing out at the gardens. Although it’s not too early to start some seedlings, it’s too cold to put out seed in the ground, and I’m tired of my household projects. Let me rephrase that: I’m tired of having to do projects to get me through winter. I want to get my fingers in the dirt, to feel the “freshening breeze” on my face and neck, I long to be one with the earth again. I have a bad case of spring fever.
So what do we do in late February to get by?
1. Plan your garden layouts.
2. Check all your tools. Take the mower and tools that need spring checkups and sharpening to the shop now, before the rush.
3. Spread chicken manure on the garden beds.
4. Make a list of the seed you need. Set up a Seed Exchange with friends. Don’t forget flowers!
5. Get your seedling pots and trays in order.
Mix seedling dirt.
6. Plant below-ground seed now: carrots, onions, turnips, garlic, beets, potatoes. They grow best if planted after the full moon.
7. Plant peas on February 28th, the full moon day
What do YOU do during the winter lull? How do you get through garden fever? Planning seems to be key. Also staying in touch with other gardeners. Blogging about gardening helps, at least I can talk about the gardens and dream about July, when the gardens come to fruition and the long winter wait will seem to be worth it.
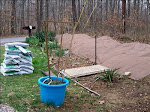
A quick way to make your raised bed gardens is to use cinder blocks to enclose the garden area. Cinder blocks are about $1.30 each. I like my gardens to be small enough to reach across, so I used 24 blocks for a cost of about $30.
Line the bottom of the area and under the cinder blocks with thick layers of newspaper to kill weeds.
Fill garden area with compost, leaves, sand and soil. Cover with a landscape cloth that allows rain to run through. Allow the heap to rest for a week. Then pour a beer over the whole pile. Cover.
Fill the holes in the concrete blocks with garden soil and plant with herbs and flowers. Petunias and marigolds help repel pests and beautify the cinder blocks.
Your compost should not smell bad. When you pack it in the garbage can mentioned in the former post, you should be careful to pack everything loosely. I sometimes spread a little dirt over the top of mine, but I use dirt sparingly. I follow the directions I’ve given on my posts.
Recently our composting garbage can filled up with compost layers, so Alan built a square wooden frame for the next raised garden bed in the back yard. We lined the bottom of the frame with a thick layer of newspaper to kill weeds. The inks and soy in the paper decay and are beneficial to compost. Next, we upended the garbage can. Try to keep from tipping over the pile. Pour a can or bottle of beer over the pile. Cover the pile with a tarp to keep the rain from washing out all the ingredients. My tarp allows water to slowly seep into the compost pile, wetting it and keeping the enzymes active.
Love your compost pile. Rake through the pile after a week, then once a week rake the pile backwards and forwards. Gradually, miraculously, a rick dark earth will form.
2.Mount wire mesh across two pieces of wood to create a screen raised slightly off the ground.
3.Upend the garbage can onto the screen.
4.Cover the screen with a thick layer of newspaper.
5.Spread a thin layer of kitchen waste on the newspaper.
6.Mound a layer of dry leaves and dirt on top of that.
7.Sprinkle with worm casings
8.Make a second layer of kitchen waste.
9.Cover with soil and dry leaves. You can also use dry grass cuttings from your yard.
Keep the compost loose.
Never add anything harmful to your compost. Some shrubbery is poisonous so don’t add anything except grass cuttings to your compost. Don’t use meat or meat juice. Shrimp shells are good. Eggshells are good. I do not use manure in my compost because I don’t have access.
If possible, grind up or chop up whatever you add to compost. This step creates more work for you in the beginning, but the end results are well worth it.
Boosts
Worms
Instead of using animal manure in your compost, try using worm castings, a super boost. Follow directions for making worm casting tea.
Leaves
Every fall I beg for leaves. I keep some of the leaves in bags to add to the compost. The rest I spread liberally in a thick layer on my garden beds. I tarp them down with landscape cloth that allows the rain to filter through. By planting time the leaves having decomposed enough to be turned into the soil.
Grass
During grass-cutting season, we let the grass on the back half of our land grow long. When it is cut, I let it lie in the sun until dried out before raking up to use in compost. Grass acts a green manure in your compost, eliminating the need to use animal wastes.
Beer
You can add a half bottle of beer per 2 bushels. The beer contains yeast which will ferment.
Charcoal
We have an outdoor fire pit. I dump the cold ash and charcoal directly into the compost. Be SURE you allow ample time for the ash/charcoal to cool.
Blood Meal
If you use blood meal, remember it is high in nitrogen and can burn your plants. It will speed the breakdown process in your compost. Be advised that blood meal is a slaughterhouse by product.
Herbs for the garden
Comfrey tea is a wonderful addition to compost. After making poultices and tinctures, always bless the herb and put it into the compost to go back to the earth.
Bone Meal
Adds phosphorus to the soil and can be used liberally. Sprinkle on compost.
Epsom Salts
Add magnesium to the soil.
Endgame
At the end of one month, I lift the garbage can off the compost pile and cover the pile with a tarp. Once a week I uncover the heap, stir the compost, then wet it down and re-tarp. I use a tarp so that rain doesn’t wash out all the nitrogen in the pile. With care and boosting, you can produce good compost in 3 months. Just in time for spring planting.
I've begun to research biodynamic gardening. I've laid out all the garden beds (8). Inside the fence where the beds are more sheltered I plan to use plastic lean-tos to cover the plants so I can get started earlier. Below is a schedule of moon phases and my planting times. You can save yourself some time by consulting the Farmer's Almanac, which shows a schedule for planting indoors and out. I'll follow their recommendations which are very similar to my own research listed below. I'm getting started earlier than usual because I am experimenting with covered beds.
Capricorn- An earth sign. Productive and dry. Good for planting potatoes and other root crops, and for encouraging strong hardy growth. Cut back plants damaged by cold. Good for grafting, and pruning to promote healing, and applying organic fertilizer. December 22 to January 19
Jan 30 – full moon Jan 15 – new moon Jan 16 Start petunias
Aquarius- An air sign. Barren and dry. Harvest root and fruit for storage. Cultivate, destroy weeds and pests. Good for planting onion sets. January 20 to February 18
Full moon Jan 30th New Moon Feb 14 Feb 15 Start lettuce, cabbage, kale, spinach, basil, thyme, cilantro Jan 31 Start carrots indoors.
Pisces- A water sign. Very productive and moist. Second best sign for planting and transplanting. Especially good for root growth and irrigation. February 20 to March 20
Full Moon Feb 28 New moon March 15 March 16 Transplant to outdoors: lettuce, spinach seedlings, plant snow peas, artichoke, broccoli use mini greenhouses Feb 29 - seed onions, carrots, radishes, beets in back bed. Transplant carrots. Cover with greenhouse Start indoors: Yolo peppers, tomatoes, winter squash indoors, zucchini and cukes, more lettuce, cabbage Start marigolds and zinnias indoors.


 Rough cut fields spotted with brown hay bales… smooth rounded gourds in gold, orange and green… sharp smell of mown grass… fat yellow garden spiders weaving stories in their webs…brown crunchy leaves underfoot… Farmer’s market bounty: colorful greens, papery onions, gourds and pumpkins…blue cloudless skies…clever scarecrows in straw hats and overalls…a clump of brittle corn stalks…