


Total Success! I have one itty bitty green tomato. It may never make it to maturity, but I’m happy to see its little face. This is one of four Early Girl tomatoes I rescued from the burnt up and dead plant section.
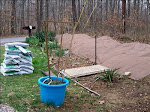
I have one itty bitty green tomato. It may never make it to maturity, but I’m happy to see its little face. This is one of four Early Girl tomatoes I rescued from the burnt up and dead plant section.  arden.” Mine is 8'x3'. I covered the ground with thick cardboard, then weed cloth. I layered the bed with compost, vermiculite, peat moss, compost. I put the soaker hose between layers. I’ve used white wooden fence for grids and support. The peas are covered with shade cloth because our temps are still in the 90s. I’ve had to cover several plants, including the pumpkins. We lost a couple of flowers on the pumpkin vines due to the heat.
The clover patch. We don’t have a lot of bees in our area, so this year we let a 5’x5’ section of back yard, formerly a meadow, grow wild and free. We wanted to use the naturally occurring clover to attract honey bees. I read that bee larvae feed on clover. Now that the clover is full of blooms we have bees every day. We’ll let a few more trimmed clover patches grow wild. That will cut down on mowing and provide habitat for insects and food for bees and butterflies. We haven’t mapped out the lower ½ acre yet, and that’s going to have to go high on the list so we end up with a plan.

Harvested: We finally cut the chives. Next time I’ll cut them sooner; some of the stems are tough. I read in Wikipedia that: “Albeit repulsive to insects in general, due to its sulfur compounds, its flowers are attractive to bees, and it is sometimes kept to increase desired insect life.”

Harvested: We finally cut the chives. Next time I’ll cut them sooner; some of the stems are tough. I read in Wikipedia that: “Albeit repulsive to insects in general, due to its sulfur compounds, its flowers are attractive to bees, and it is sometimes kept to increase desired insect life.”
Stored:
25 lbs white sugar
2 bottles Excedrin Migraine
6 bottles of propane for the camping equipment
4 gallons of water (I use baking soda and water to clean the bottles and lids, and then pour in filtered water and a few drops of bleach according to instructions. These containers are stored indoors in an air conditioned dark closet for maximum mileage.)
Froze a quart of cherries and two quarts of raspberries.

Water Storage: In an article on the Walton Feed site, Vicki Tate writes, “Fourteen gallons of water per person is the suggested amount to store for a two-week emergency situation.” That’s a gallon a day minimum per person for simple existence. Hub and I have stored, so far, only 11 gallons of water. That’s enough for five days each. We’ve started purifying and storing two or three two-liter bottles of water per week. Our new water catch tank is a 110 gallon capacity recycled container which we had professionally cleaned. The tank is safe for human drinking water; still, our current plan is to use it to water the gardens. If we get sufficient rainfall to fill the tank, this system could also store bath and laundry water for us to use in case of emergency.
Recycled/Reused:
· Cleaned out my bedroom closet and recycled shoes to the mission, made room to store the winter coats. My sister, Kathy, says hang lavender sachets in the closets to repel moths. I’ve found that small #2 cones coffee filters work well as sachets, and that helps me use up the coffee filters I bought in the wrong size.
· Recycled all cardboard by using it to build more square foot beds in the side yard. Recycled juice and soda bottles for water storage.
· Composted almost everything (no kitty litter)
· Took reusable bags with us everywhere
· Saved cans for candle making
· One of my sons moved Hub’s book samples to my bedroom closet so we could have another closet for storage.
Prepped: I used my car to dry the chives. I put parchment paper on a baking tin, put the chives on the paper, and covered them with a cotton tea towel. Then I put the whole contraption in Hub’s car. The chives dried fast, and got to ride around with my husband who had no idea why I had put onions in his car.
 Cooked something new: I found a brand new Terra Cotta Baker on ebay for less than half price. I baked two loaves of no-knead bread. The crust is crackly, the crumb is loose and the taste is delicious. Very yeasty smell and flavor. I didn’t get the lift I wanted because I’m using cheap flour, not bread flour. Cheap flour doesn’t have much protein so it doesn’t give good rise. I also could’ve given the yeast another few hours to ferment but the dough looked great. I don’t use the bread machine to make this bread so we’ve cut out another small appliance.
Recipe #1 was 2c white flour, 1 c organic whole wheat flour, 1 ½ c water, ¼ tsp ACTIVE DRY YEAST (I didn’t have any instant yeast), 2 ½ tsp salt.
Recipe #2 was a no-go.
Recipe #3 was 3c white flour, I cup beer, 1/2c water, 1 ¼ Tbl white vinegar, 2 ½ Tbl sugar,1 ¾ tsp salt.
Contribute to local systems: We bought Hatcher Dairy milk.
~~~~~~~~~~~~~~~~~~~~~~~~~~~~~~~~~~~~~~~~~~~~~~~~~~~~~~~~~~~~~~~~~~~~~~
Spro uts Jar Method http://www.btinternet.com/~bury_rd/sprout.htm
I ordered two sprouting lids from Wheatgrass Kits.com. http://www.wheatgrasskits.com/sprouting/sprout_lid.htm
Sprout Jar Lids "Jar Method" Sprouting Instructions
· For a quart-sized jar, start with 1 1/2 tablespoons seeds inside the jar, screw on the fine mesh sprouting lid and partially fill the jar through the sprout jar lids with warm water, not hot. Swirl it around to clean the seeds, then pour out. Refill with warm water to cover at about 3 times their depth & let soak overnight, away from light. This gets the germination process started.
· Pour off the soak water. Find a location that is not exposed to direct sunlight. Place drained jar propped at an angle to allow any extra water to drain out. Turn the jar to spread out the seed. Cover the jar with the sprout jar lids and a dishtowel and leave for 3 to 4 hours.
· Rinse sprouts with cool, fresh water 2 or 3 times each day until they are ready to eat or refrigerate. When they begin to throw off the seed hulls, let the jar with sprout jar lids installed overflow with the water and the hulls will float out the top through the sprouting lid screen. Turn the jar to spread out the seed each time you rinse.
· Pour the sprouts into a pan or sink of clean water. Skim off any remaining hulls that float to the surface. Other hulls will fall to the bottom of the container. Pull out the sprouts, gently shake off excess moisture and drain in a colander.
· Clean the jar and sprout jar lid. Place sprouts for greening back into the jar. Place in indirect sunlight. Near a kitchen window is fine. After the sprouts have greened with chlorophyll and carotene for a day or so, rinse, drain with sprouting lids & eat or refrigerate.
· Sprouts will stay fresh & hearty for a week or more when refrigerated, if you rinse them every day or two. You can even give the green sprouts an extra hour of sunlight after rinsing to keep them at their nutritional peak. Caution: Since sprouts are frost sensitive, don't place sprouts near the freezer compartment.
~~~~~~~~~~~~~~~~~~~~~~~~~~~~~~~~~~~~~~~~~~~~~~~~~~~~~~~~~~~~~~~~~~~~
 uts Jar Method http://www.btinternet.com/~bury_rd/sprout.htm
I ordered two sprouting lids from Wheatgrass Kits.com. http://www.wheatgrasskits.com/sprouting/sprout_lid.htm
Sprout Jar Lids "Jar Method" Sprouting Instructions
· For a quart-sized jar, start with 1 1/2 tablespoons seeds inside the jar, screw on the fine mesh sprouting lid and partially fill the jar through the sprout jar lids with warm water, not hot. Swirl it around to clean the seeds, then pour out. Refill with warm water to cover at about 3 times their depth & let soak overnight, away from light. This gets the germination process started.
· Pour off the soak water. Find a location that is not exposed to direct sunlight. Place drained jar propped at an angle to allow any extra water to drain out. Turn the jar to spread out the seed. Cover the jar with the sprout jar lids and a dishtowel and leave for 3 to 4 hours.
· Rinse sprouts with cool, fresh water 2 or 3 times each day until they are ready to eat or refrigerate. When they begin to throw off the seed hulls, let the jar with sprout jar lids installed overflow with the water and the hulls will float out the top through the sprouting lid screen. Turn the jar to spread out the seed each time you rinse.
· Pour the sprouts into a pan or sink of clean water. Skim off any remaining hulls that float to the surface. Other hulls will fall to the bottom of the container. Pull out the sprouts, gently shake off excess moisture and drain in a colander.
· Clean the jar and sprout jar lid. Place sprouts for greening back into the jar. Place in indirect sunlight. Near a kitchen window is fine. After the sprouts have greened with chlorophyll and carotene for a day or so, rinse, drain with sprouting lids & eat or refrigerate.
· Sprouts will stay fresh & hearty for a week or more when refrigerated, if you rinse them every day or two. You can even give the green sprouts an extra hour of sunlight after rinsing to keep them at their nutritional peak. Caution: Since sprouts are frost sensitive, don't place sprouts near the freezer compartment.
~~~~~~~~~~~~~~~~~~~~~~~~~~~~~~~~~~~~~~~~~~~~~~~~~~~~~~~~~~~~~~~~~~~~
Bean Recipes
Hoppin John
Ingredients
1 cup small dried beans such as cowpeas or black-eyes5 to 6 cups water1 dried hot pepper (optional) 1 smoked ham hock1 medium onion, chopped (about 3/4 cup) 1 cup long-grain white rice
Preparation
Wash and sort the peas. Place them in a saucepan, add the water, and discard any peas that float. Gently boil the peas with the pepper, ham hock, and onion, uncovered, until tender but not mushy — about 1 1/2 hours — or until 2 cups of liquid remain. Add the rice to the pot, cover, and simmer over low heat for about 20 minutes, never lifting the lid.
Remove from the heat and allow to steam, still covered, for another 10 minutes. Remove the cover, fluff with a fork, and serve immediately.
In Cuba, this versatile side dish is known as congrí. Louisiana has its own version of red beans and rice, of course, but in that one you won’t find the oregano, cumin or cilantro.
Servings: Makes 6 servings.
Red Beans and Rice
Ingredients
Beans1 cup dried small red kidney beans2 quarts water1/2 small onion1 2-inch square of red bell pepper2 garlic cloves, peeled2 fresh cilantro sprigs1/2 teaspoon ground cumin
Rice1 1/2 cups long-grain white rice, rinsed in cold water 5 times
3 tablespoons olive oil2 cups chopped onions1/4 cup chopped red bell pepper2 garlic cloves, minced1/2 teaspoon ground cumin1/2 teaspoon dried oregano
Preparation
For beans: Soak kidney beans in large bowl with enough cold water to cover by 3 inches, at least 4 hours or overnight. Drain in a colander and keep wet until the bean hulls crack open (or even sprout). Place 2 quarts water, beans and next 5 ingredients in large pot. Bring to boil over medium-high heat. Reduce heat to medium, cover and simmer until beans are tender, stirring occasionally, about 50 minutes. Season to taste with salt. Drain, reserving beans and bean cooking liquid separately. Discard vegetables and cilantro.
For rice: Bring 3 cups bean cooking liquid to boil in heavy medium saucepan. Add rice; bring to boil. Reduce heat to medium-low, cover and simmer until almost all liquid is absorbed, about 20 minutes. Uncover; fluff with fork.
Heat oil in heavy large skillet over medium-high heat. Add onions, bell pepper, garlic, cumin and oregano and sauté until onions are beginning to brown, about 5 minutes. Stir in beans and rice; cook until heated through, about 5 minutes. Season with salt and pepper.
Cuban Black Beans and Rice
This is also a great vegetarian entrée.
Servings: Serves 4 to 6.
Ingredients
1 15-ounce can black beans, rinsed, drained1/2 large red onion, very thinly sliced2 tablespoons balsamic vinegar*
1 tablespoon olive oil1 white onion, finely chopped4 large garlic cloves, chopped1 cup Arborio rice*3 1/2 cups canned unsalted chicken broth1/2 cup dry white wine2 large bay leaves1/2 teaspoon turmeric1/8 teaspoon (or more) cayenne pepper
* Balsamic vinegar and Arborio rice are available at specialty foods stores, Italian markets and some supermarkets.
Preparation
Combine first 3 ingredients in medium bowl. Let stand 30 minutes, stirring occasionally. Season with salt and pepper.
Meanwhile, heat oil in heavy medium saucepan over high heat. Add onion and garlic and sauté until translucent, about 5 minutes. Add rice and stir 1 minute to coat with onion mixture. Add broth, wine, bay leaves, turmeric and cayenne pepper and blend well. Bring mixture to boil; stir well. Reduce heat to medium and simmer until rice is tender and mixture is creamy, stirring occasionally, about 25 minutes. Season to taste with salt, pepper and cayenne.
Spoon rice onto platter. Arrange beans and onion garnish alongside.
Suitable accompaniments to this risotto-like dish are crusty bread, an avocado and orange salad with a cilantro vinaigrette and, to top it off, coconut pie.
Servings: Serves 2.
West Indian Rice and Beans
Ingredients
2 1/2 cups (about) canned vegetable broth1 15- to 16-ounce can kidney beans, drained1 cup canned unsweetened regular or light coconut milk1 tablespoon minced seeded jalapeño chili1 teaspoon dried thyme1/4 teaspoon ground allspice3/4 cup medium-grain white rice
1 cup thinly sliced green onions
Preparation
Combine 2 cups vegetable broth, kidney beans, coconut milk, minced jalapeño chili, thyme and allspice in heavy large saucepan. Bring mixture to boil over medium-high heat. Stir in rice. Reduce heat to medium-low and simmer mixture uncovered until most of liquid is absorbed and rice is almost tender, stirring often, about 20 minutes.
Mix 3/4 cup green onions into rice. Continue to simmer until rice is very tender and mixture is creamy, adding more broth by 1/4 cupfuls if mixture seems dry, about 5 minutes longer. Season to taste with salt and pepper. Transfer to serving bowl. Sprinkle with remaining 1/4 cup green onions and serve.