Saturday, April 16, 2011

More Scrapbooking

Thanks for all the compliments on my scrapbook project. As promised, here are a few more pages to look at. Feel free to copy any layouts or use any ideas you get from my pages.
Halloween 2010
Alan's graduation from Fordham, complete with original tassle.

Tribute page to my mother.


Thanks again for the compliments.

Monday, March 28, 2011

Scrapbooking

Scrapbooking is all the rage, and the elements are cute, so I thought I'd give it a try. First I used an old copy of Farewell to Arms and did some creative things to the pages. Then I went on to trying my hand at traditional scrapping. It's relaxing and keeps my mind occupied in a zen-like way. Below are some of my beginner's pictures. Many still require missing elements.


For more information there are plenty of sites about scrapping, complete with free ideas. To get started, read more about this cute hobby at http://scrapbooking.about.com/.

Thursday, March 3, 2011

Make Your Own Granola


With food prices increasing every day, it makes sense to cut corners whenever possible. One way to reduce costs is to make your own granola. You can eat it alone with milk or hot water, on top of other cereals, mixed into yogurt. When you make you own, you are able to control what kind of additives and ingredients go into your food.  

Ingredients:
Oatmeal
1 c. Honey
2 TBLS. Margarine
Fruits
2 cups Flax seed
1 cup nuts
2 cups sunflower seed 

Gather all your ingredients together.

Mix honey and margarine in a saucepan. Heat until almost boiling. 

Mix together sunflower seed...


Add nuts and flax seed...then fill bowl with oats. Pour the honey mixture over the ingredients and gently stir and turn the oat mixture until evenly coated. 


 Prep pans by lining with foil if desired, and spraying with PAM spray. Very important to spray the pans to keep the granola from sticking.


Spread  the oat mixture evenly in two pans. Bake at 350 degrees for 15 minutes. Let cool slightly.


Add fruits now, when granola is slightly cool. Gently mix together in pans. 


When fully cooled, finished product should be sealed in an airtight container.


Thursday, February 24, 2011

Wormy Delight


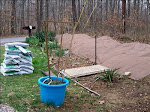
This is such great info that I lifted it from the Gardens Alive website located at http://www.gardensalive.com/product.asp?pn=8815 to share with you.  I can personally attest to the value of adding earthworms to your garden sites. Read on to find out more from Gardens Alive®!  

“Encapsulated Earthworm Cocoons from Gardens Alive!®  are convenient and easy to add to your garden soil. You plant them in garden soil just as you would plant ordinary seeds. They’re especially useful for people switching from conventional to organic gardening. Better soil quality gives your organic seeds the best start. Each cocoon contains 1-10 eggs, depending on the species, and each egg will produce one earthworm. 

Greatest Living Natural Soil Boosters
Gardeners covet earthworms' presence in their plots because:
  • their castings boost nitrogen in the soil
  • they move deep-soil nutrients closer to plant roots
  • their tunnels loosen soil, improving aeration
  • their activities help soil particles bond, balancing moisture retention and drainage

Earthworms perform this same magic in compost, speeding the development of nutrient dense, moisture-dispersing humus.”


Independence